Being launched on 29th of July 2015, Windows 10 by now has already made a place for itself in the hearts of the ‘Gadget Freaks’. There are a lot of differences in the features of Windows 8 and Windows 10. After the release of Windows 8, the total format and software designing had completely changed. However the format of Windows 8 was claimed to be more user friendly by many consumers. Even today while buying, people prefer Windows 7 Ultimate more than Windows 8, in case of Laptops or PCs. On the other hand, gadget lovers and gamers love Windows 8 for its gaming configuration. So keeping in mind the requirements and demand of both the users, Microsoft launched its freshly configured version of operating system called Windows 10.
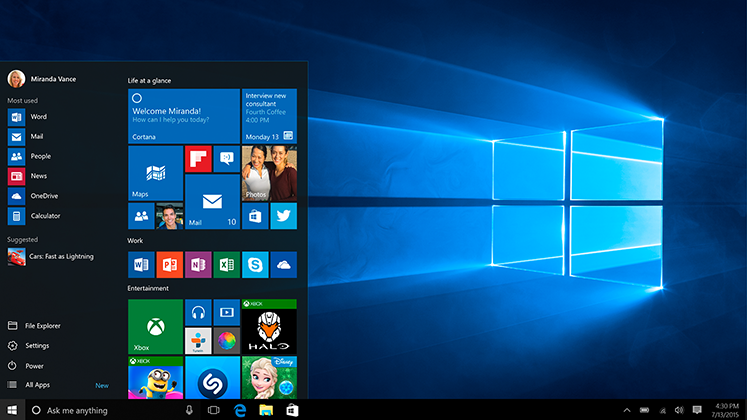
The features of Windows 10 have been kept much similar to those of Windows 7 Ultimate and Windows 8.1, keeping in mind the needs of regular users and those of the gamers as well. We can give our very favorite new OS of Microsoft, the nickname “All Rounder”. Namely Grand Theft Auto 5, Tomb Raider, Last Night, Far Cry 4, Bio-shock Infinite, etc are the games which can be run on Windows 10. Modern graphics cards are all having Windows 10 support.
Windows 10 System Security
Windows 10 incorporates multi-factor authentication technology. The operating system includes improved support for bio-metric authentication through the Windows Hello and Passport platforms; devices with supported cameras (requiring infrared illumination, such as Intel Real Sense), which allow users to login with face- or iris-recognition. Devices with supported readers support fingerprint-recognition login. The Passport platform allows networks, software and websites to authenticate users using either a PIN or bio-metric login to verify their identity, without sending a password. But in the era of technological development, where accessing a personal data is just a matter of seconds; are these securities strong enough to protect a general user’s privacy? Question arises when we panic about the fact of hacking. Hacking doesn’t always need a direct link. It can be easily done using ‘Key logger’.
What is Keylogger?
Even before the question pops up in your mind let me answer it. A key logger is a type of surveillance software (considered to be either software or spyware) that has the capability to record every keystroke you make to a log file, usually encrypted. A key logger recorder can record instant messages, e-mail, and any information you type at any time using your keyboard. This means that using a key logger Windows can access a user’s personal data, be it a password or a text or something else. But there is nothing to worry about. We all know that science may bring curse later, but it brings boon first. Whenever scientists create something, they keep an alternative way open to save the discovery from misuse. So there is no need to panic regarding the personal data access using Key logger. We all love our privacy right? So here I present the process which can be used to disable the key logger of Windows 10.
Steps to disable Windows 10 Keylogger:
Before or during installation:
- Do not use Express Settings. Hit Customize, and make sure everything is turned off.
- It’s strongly recommended that you use a local account with Windows 10.
After Installation:
- Head to Settings > Privacy, and disable everything, unless there are some things you really need.
- While within the Privacy page, go to Feedback, select Never in the first box, and Basic in the second box.
- Head to Settings > Update and Security > Advanced Options > Choose how updates are delivered, and turn the first switch off.
- Disable Cortana by clicking the Search bar/icon.
- (Optional) Disable web search in Search by going to Settings, and turning off Search online and include web results.
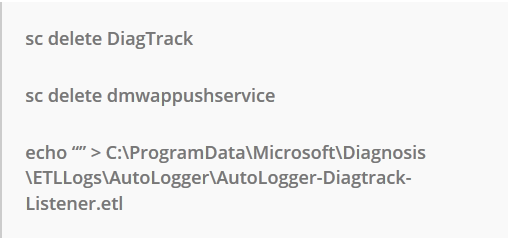
- Open up the Command Prompt by launching cmd as an administrator, and enter the following:
- Open up the Group Policy Editor by launching gpedit.msc as an administrator. Go through Computer Configuration > Administrative Templates > Windows Components > Data Collection and Preview Builds. Double click Telemetry, hit Disabled, then apply.
- While still in the Group Policy Editor, go through Computer Configuration > Administrative Templates > Windows Components > OneDrive, double click Prevent the usage of OneDrive for file storage, hit Enabled, then apply.
- Open up the Registry Editor by launching regedit as an administrator. Go through HKEY_LOCAL_MACHINE\SOFTWARE\Microsoft\Windows\CurrentVersion\Policies\DataCollection, select AllowTelemetry, change its value to 0, then apply.
- First, download the Take Ownership tweak and enable it. Then, head to the Hosts File by going through C:\Windows\System32\Drivers\Etc, take ownership of the hosts file, and add the following IPs into it:
127.0.0.1 vortex.data.microsoft.com
127.0.0.1 vortex-win.data.microsoft.com
127.0.0.1 telecommand.telemetry.microsoft.com
127.0.0.1 telecommand.telemetry.microsoft.com.nsatc.net
127.0.0.1 oca.telemetry.microsoft.com
127.0.0.1 oca.telemetry.microsoft.com.nsatc.net
127.0.0.1 sqm.telemetry.microsoft.com
127.0.0.1 sqm.telemetry.microsoft.com.nsatc.net
127.0.0.1 watson.telemetry.microsoft.com
127.0.0.1 watson.telemetry.microsoft.com.nsatc.net
127.0.0.1 redir.metaservices.microsoft.com
127.0.0.1 choice.microsoft.com
127.0.0.1 choice.microsoft.com.nsatc.net
127.0.0.1 df.telemetry.microsoft.com
127.0.0.1 reports.wes.df.telemetry.microsoft.com
127.0.0.1 services.wes.df.telemetry.microsoft.com
127.0.0.1 sqm.df.telemetry.microsoft.com
127.0.0.1 telemetry.microsoft.com
127.0.0.1 watson.ppe.telemetry.microsoft.com
127.0.0.1 telemetry.appex.bing.net
127.0.0.1 telemetry.urs.microsoft.com
127.0.0.1 telemetry.appex.bing.net:443
127.0.0.1 settings-sandbox.data.microsoft.com
127.0.0.1 vortex-sandbox.data.microsoft.com
For more convenience check: https://www.youtube.com/watch?v=Srp7x3-hcjo
Congratulations! You are now free from the unnecessary interruption of Windows into your privacy. You truly own your Windows 10 device now. To disable Windows 10 was that very easy. For more updates and information on things like using WatsApp without verifying phone number, using WatsApp without a number, rooting YU YUPHORIA, etc be in touch with me or visit https://techvicity.com/ . Please feel free to share your thoughts in the comments sections below.